Filters
Reset
Your car
Reset
  • Universal Accessories
  • brand iconAcura
  • brand iconAlfa Romeo
  • Avatr
  • brand iconAudi
  • brand iconBMW
  • brand iconBentley
  • brand iconBrilliance
  • brand iconBugatti
  • brand iconBuick
  • brand iconBYD
  • brand iconChangan
  • brand iconCadillac
  • brand iconChery
  • brand iconChevrolet
  • brand iconChrysler
  • brand iconCitroen
  • Cowin
  • brand iconCupra
  • brand iconDAF
  • brand iconDacia
  • brand iconDaewoo
  • brand iconDaihatsu
  • Denza
  • brand iconDongfeng
  • brand iconDatsun
  • brand iconDodge
  • brand iconDS Automobiles
  • brand iconFAW
  • brand iconFerrari
  • brand iconFiat
  • brand iconFisker
  • brand iconFord
  • brand iconGAC Motor (Trumpchi)
  • brand iconGeely
  • brand iconGenesis
  • brand iconGreat Wall
  • brand iconGMC
  • brand iconHonda
  • brand iconHongqi
  • brand iconHyundai
  • brand iconHummer
  • brand iconJAC
  • brand iconJaguar
  • brand iconJeep
  • brand iconJetour
  • brand iconInfiniti
  • brand iconIsuzu
  • brand iconIveco
  • brand iconKIA
  • brand iconLamborghini
  • brand iconLada
  • brand iconLancia
  • brand iconLandRover
  • brand iconLeapmotor
  • Leopaard
  • brand iconLexus
  • brand iconLi Auto
  • brand iconLifan
  • brand iconLincoln
  • brand iconLotus
  • brand iconLucid
  • brand iconMAN
  • brand iconMaserati
  • brand iconMazda
  • brand iconMcLaren
  • brand iconMG
  • brand iconMercedes-Benz
  • brand iconMitsubishi
  • brand iconMini
  • Moskvich
  • brand iconNissan
  • brand iconOpel
  • brand iconPeugeot
  • brand iconPolestar
  • brand iconPorsche
  • brand iconRivian
  • RAVON
  • brand iconRenault
  • brand iconRolls-Royce
  • brand iconSaab
  • brand iconScania
  • brand iconSinotruk
  • brand iconSeat
  • brand iconSkoda
  • Skywell
  • brand iconSmart
  • brand iconSsangYong
  • StreetScooter
  • brand iconSubaru
  • brand iconSuzuki
  • brand iconTesla
  • brand iconToyota
  • brand iconVolkswagen
  • brand iconVolvo
  • brand iconVolga
  • brand iconXiaomi
  • brand iconXpeng
  • brand iconWuling
  • brand iconZeekr
  • brand iconGAZ
  • brand iconUAZ
Category
Show products
Price USD
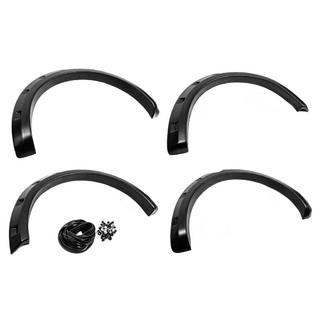
Wide Fender Flares (8 pcs, ABS) Renault Duster 2018-2024 photo 1Wide Fender Flares (8 pcs, ABS) Renault Duster 2018-2024 photo 2Wide Fender Flares (8 pcs, ABS) Renault Duster 2018-2024 photo 3Wide Fender Flares (8 pcs, ABS) Renault Duster 2018-2024 photo 4
From148USD
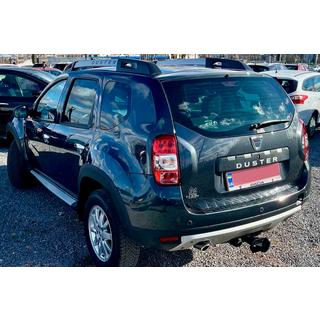
Wide Fender Flares (8 pcs, ABS) Dacia Duster 2018-2024 photo 1Wide Fender Flares (8 pcs, ABS) Dacia Duster 2018-2024 photo 2Wide Fender Flares (8 pcs, ABS) Dacia Duster 2018-2024 photo 3Wide Fender Flares (8 pcs, ABS) Dacia Duster 2018-2024 photo 4
From148USD

Frequently asked questions

Yes. Bushwackers are called outer wheel arch extensions that protrude beyond the fender. They differ from inner fender liners in that they are mounted on the outside, not inside the arch.
For most of the flares in this section, no: they are installed with glass adhesive sealant and double-sided tape. The mounting method is specified in each product’s specifications.
No, the specifications for most kits state directly that glue is not included. It is purchased separately.
The flares are sold as a full set for all arches; individual parts from the kit are usually not available. The kit contents are listed on the product page.
No, there are different products for Hilux before and after the facelift: 2015–2020 and 2020–2024. There are also different versions for L200 2015–2019 and 2019+ and for Navara with AdBlue and without.
Meliset fiberglass versions are sold for painting in the body color. Black ABS plastic flares are installed without painting.

How to Install Fender Flares

  1. Match the model and version Check the production years, facelift, and trim: versions with and without AdBlue, XLT, AMG, or Base are different products.
  2. Lay out and test-fit the parts Sort the kit by wheel arch, determine the left and right sides, test-fit each part without adhesive, and mark its position.
  3. Prepare the body Wash the fenders, remove any rust traces from the contact area, dry and degrease the surface. Work in a warm, dry room.
  4. Apply the tape and sealant Apply double-sided tape and use glass adhesive sealant according to the video instructions on the product card. The adhesive is purchased separately.
  5. Install and press the extensions Position the part according to the markings, press evenly along the entire length, and secure it with masking tape while it dries.
  6. Let the adhesive cure Do not wash the car or drive off-road until the adhesive sealant has fully set; then remove the securing tape.

Pros and cons